The durability and elegance of granite countertops make them a popular choice for kitchens and bathrooms.
Despite their hefty weight and price tag, homeowners love the way these countertops add value and style to their homes.
But have you ever wondered how professional installers manage to lift and install these heavy slabs with such precision and care?
In this article, we will take a behind-the-scenes look at the steps involved in installing granite countertops at your home, from removing old countertops to cleaning and sealing new ones.
Whether you are planning a kitchen renovation or simply curious about how the pros work their magic, this article will give you a comprehensive understanding of the installation process.
So without further ado…
Here’s how granite countertops are installed by professionals.
1. Removal of The Existing Countertop
The first step in installing a new granite countertop is removing the existing one.
This task is usually performed by a team of trained professionals, either your contractor or the countertop installer.
Make sure to ask your countertop installer if they can remove the existing countertop or if you need to ask your contractor to do it.
Whoever is removing the countertop, they will shut off the water and disconnect the cooking appliances before starting the removal process.
Next, they will unscrew and remove the faucet, sink, and other fixtures attached to the old countertop.
During the removal process, the team will take precautions to ensure that the cabinet or the kitchen walls don’t get damaged.
They will use specialized tools to cut the caulk and glue that hold the countertop in place.
Once removed, the team will carefully lift the countertop from its position and store it in a safe area or discard it.
It’s also common for some wall plaster to come off during the removal process.
However, this isn’t a problem as it can be covered with a new granite or tile backsplash later on.
Removing old countertops is a time-consuming and labor-intensive process that requires expertise and care.
The team must work systematically to avoid causing any damage to the kitchen or injuring themselves.
Once the old countertop is removed, the installation crew moves on to the next step – bringing the new countertop into your home.
2. Bringing the Granite Countertop Into Your Home
Once the old countertop is removed, the installation team will bring in the new granite countertop pieces for installation.
Granite is a heavy, natural material that needs extra care while moving.
So the professional installers use specialized tools and techniques to transport it safely.
The granite countertop pieces are usually brought to your home in a large truck and then unloaded using carts or trolleys.
From there, the installation team carefully carry each piece into your kitchen and lay them on a level surface to avoid cracking or damage.
During transportation, countertop installers take extra care to ensure that the granite countertop doesn’t scratch or chip.
So they may wrap each slab in protective blankets or foam and use straps or clamps to secure them into place.
Once the granite pieces are safely inside your home, the installation team will move to the next step – leveling and securing the cabinets.
Recommended Reading: The Manufacturing Process of Granite Countertops
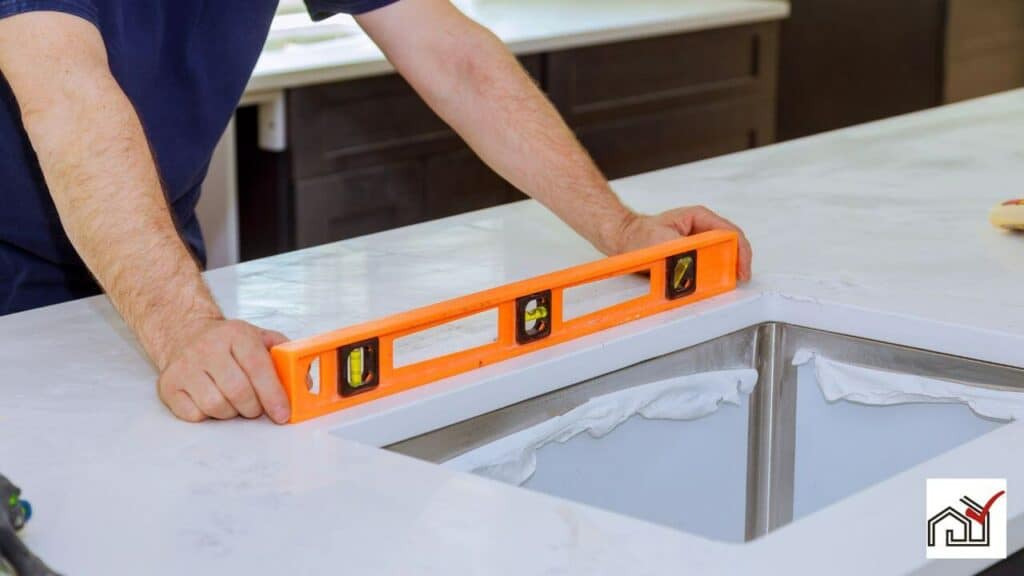
3. Leveling and Securing the Kitchen Cabinets
Ensuring that the cabinets are level and secured is an important step in the installation of granite countertops.
That is why before starting the installation work, it’s recommended to remove the existing countertops.
Doing this allows your countertop installation team better evaluate the levelness and sturdiness of the cabinets.
The installation team will carefully evaluate each base cabinet, checking for any unevenness or instability.
Any variations in the plane will be offset with small wood shims during installation.
These small pieces of wood are placed beneath the granite to help level it out and prevent tilting or sagging.
Once the cabinets are level and stable, the granite countertop can be placed on them.
4. Placing and Securing the Granite Countertop
This is a crucial step since it needs precision and attention to detail.
The installation team will carefully place the individual granite countertop pieces on the leveled cabinets.
They will use epoxy to cement the granite countertop pieces together at the seams.
There are two types of epoxy: clear and neutral color.
The installation team will color and blend the epoxy at your home so that it matches the color of your countertop.
Once the seams dry up, they will skim off the excess epoxy with a razor blade.
This will ensure that the seam is as smooth as possible.
This step is critical because any excess epoxy can mar the appearance of the countertop and compromise its durability.
After cementing the seams, the team will secure the granite countertop to the cabinets with the help of attachment blocks.
These are called “bondo blocks.”
These blocks provide extra support and stability to the countertop, preventing it from shifting or cracking.
Now coming to the walls, you need to keep in mind that none of the walls are perfectly straight.
Yes, not even the ones in your brand-new home.
So to capture any imperfections in the walls, professional installers use a digital templating system while taking measurements of your countertop.
They will then scribe the granite countertop’s backside to match the wall’s imperfections.
Despite these efforts, you may still notice some gaps between the back of the countertop and the kitchen wall.
However, your tile or granite backsplash will cover these gaps entirely.
So there is no need to worry about the imperfections in the countertop’s installation.
5. Installing the Backsplash
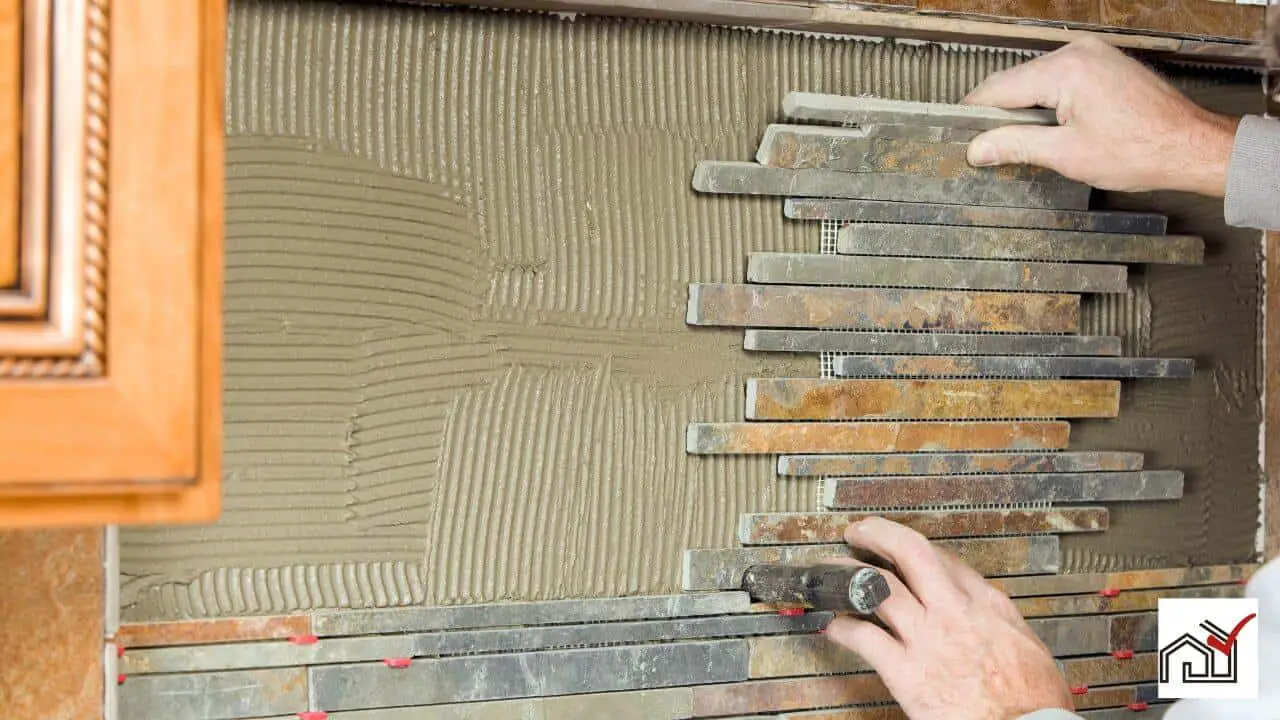
Once the granite countertop is secured in place, the installation team will move on to installing the backsplash.
In some cases, the backsplash can be pre-fabricated to fit the exact measurements of the countertop.
However, your professional installation team will usually have to make some adjustments to backsplash pieces.
These adjustments can be made at your home as necessary to ensure that the seam between the countertop and backsplash is proper.
The installation team will also ensure that the backsplash is level and securely attached to the wall.
6. Cutting Cooktop Cutout
If you have asked for cooktop or sink cutouts on the countertop, your installer will make the initial cuts for them at their shop.
The installation team will then finish the final cuts at your home. They will also cut the holes for installing the faucets.
This is done at home because it’s risky to transport a granite slab with large holes in it.
Note that cutting the cutouts at home will create dust.
The installation team will clean up as much as possible, but you must ensure that the nearby furniture and other things are covered while the cutting is in progress.
Once the cutouts are done, you can get the cooktop, sink, and faucets installed.
7. Sealing the Granite Countertop
Now that your countertop is installed, the installation team will seal it.
Before applying the sealer, they will wipe off the dust or debris with a clean microfiber cloth.
Once your surface is clean, they will use a sealing product that is specifically made for granite.
Using a product that is not designed for granite can damage your countertop and make it look dull and discolored.
The installation team will spray the sealer evenly on the countertop surface.
After applying the first layer, they will wait for a few minutes.
They will then apply the second layer and let it dry completely.
Once the countertop is dry, they will clean the countertop one final time with a microfiber cloth.
You can test the countertop sealing by pouring a bit of water on it.
If the water doesn’t get absorbed, your countertop is sealed correctly.
If it gets absorbed, your installation team will have to apply one more layer of sealer.
It’s important to note that sealing your granite countertop isn’t a one-time event.
You will have to reseal it every year or every few years and take care of it regularly.
Further Reading: Ways to Repair Granite Countertops? | List of Granite Countertop Edges | Differences Between Granite and Marble Countertops
How Long Does It Take to Install a Granite Countertop?
On average, installing granite countertops in an average-sized kitchen takes about four hours.
However, the installation time can vary greatly depending on the degree of complexity associated with the project.
Granite slab installation will take less time than tile installation due to the complexities associated with handling tiles.
Similarly, installation in a space with limited accessibility will need more time, especially to remove the old countertop.
So keep in mind that hiring experienced professionals is the key to a swift, safe, and hassle-free granite countertop installation.