To make a padded headboard, start by cutting plywood to the size needed for the base.
Next, attach foam padding to the plywood for cushioning.
Cover the foam with batting for softness, and then wrap the whole thing with your chosen fabric.
If desired, add decorative touches.
Finally, secure the headboard to the bed frame or wall.
This DIY project can enhance the look and comfort of a bedroom.
Choose Your Materials
Choose your materials by starting with either wood or MDF for a strong foundation for your padded headboard. Wood is more durable, while MDF is smoother, suitable for upholstering. Have the wood cut to size at a hardware store for the headboard's base.
For padding, select a thick upholstery foam for comfort and a full look. Choose the foam's thickness based on your comfort preference and desired style. Attach the foam to the wood with spray adhesive, ensuring a smooth application without any irregularities.
Select upholstery fabric that matches your room's design and is sturdy for everyday use. Determine the amount of fabric needed by measuring the headboard. Cut the fabric and batting to size, and iron the fabric to eliminate wrinkles.
To assemble, use an electric staple gun to secure the batting and fabric to the wood's back. With careful work, you can create a polished and comfortable DIY upholstered headboard.
Cut the Plywood Base
To cut a plywood base for a custom padded headboard, first determine the size needed for the bed frame and room. Measure and mark the plywood before cutting. Use a circular saw or table saw to cut the plywood, ensuring it is clamped down and the workspace is stable. Check measurements before cutting to ensure accuracy.
After cutting the plywood to size, prepare it for the foam layer by cutting upholstery foam with an electric knife to the same dimensions. This ensures a clean edge for a professional appearance.
Once both the plywood and foam are cut, they can be assembled to form the main structure of the padded headboard. Accurate cutting is crucial for an aesthetically pleasing and structurally sound headboard.
Shape the Foam Padding
Double the upholstery foam and trim it to fit the plywood base precisely. Use an electric carving knife or a sharp utility knife for accurate cutting. Check the fit regularly to ensure precision. Thicker foam will make the headboard more comfortable and visually appealing.
Place the cut foam on a flat surface, then position the plywood base on top to check for overhang. Trim any excess foam for a clean edge. Cover the foam with batting that extends slightly past the edges, adding cushioning and smoothing the foam surface.
For assembly, adhere the foam and batting to the plywood with spray adhesive for a secure bond. Once set, stretch the fabric over the foam and batting, pulling it tight to avoid wrinkles. Staple the fabric from the center outwards and trim excess material for a neat look.
The result is a tailored foam padding, ready to be finished with fabric, creating a stylish and padded headboard for your bed.
Layer With Batting
Layering with batting enhances the comfort and appearance of a headboard. Batting, which is typically made from cotton or polyester, adds cushioning and prevents the fabric from sinking into the foam, resulting in a smooth and plush surface. The type of batting chosen affects the headboard's final feel and appearance.
To begin, select the appropriate batting thickness and type at a hardware store, based on personal preference and design goals. Batting is available in various weights and thicknesses, allowing for customization of the headboard's softness and insulation.
After acquiring the batting, place it over the foam on the plywood base, ensuring it is smooth and wrinkle-free. Trim the batting to fit, leaving extra material to cover the plywood edges for added softness.
Secure the batting to the plywood with a staple gun, starting from the center and moving outward to avoid puckering. An even surface is essential as the fabric will cover this layer.
If using nailhead trim, trim the batting neatly where the trim will be attached. With the batting secured, the headboard is ready for the final fabric cover.
Wrap With Fabric
After securing the batting, measure and cut the upholstery fabric to size, ensuring it will fully cover the headboard with additional material to wrap around the sides. Choose a durable fabric that matches your bedroom's decor. Cut the fabric in a straight line for a professional look.
Place the fabric face-down on a clean surface and put the headboard on top, with the foam side facing down. Begin at the center and staple the fabric to the wood, pulling it tight to avoid wrinkles. Work outwards and leave corners unstapled for later folding.
Fold the fabric over the headboard's edges at the back, pulling it tight. If desired, add decorative trim or buttons. Secure the fabric with closely placed staples for a strong hold. This is important for a well-upholstered headboard look.
Add Decorative Elements
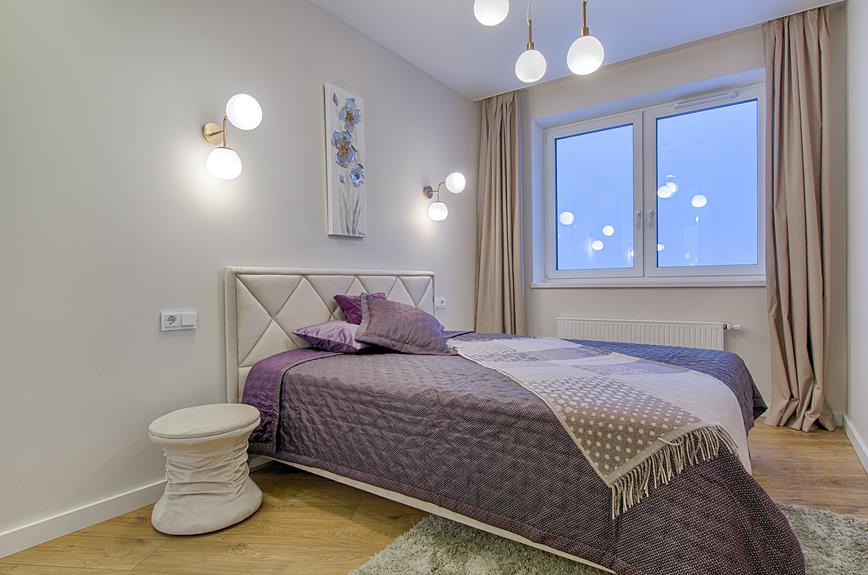
After upholstering your headboard, you can enhance its design by adding decorative elements that reflect your personal taste. Tufting is an option that can give the headboard an elegant touch. Button tufts are versatile and can be used on both queen and king-sized beds, with deep button tufts for a plush look or diamond tufting for a detailed pattern. Use fabric-covered buttons that either match or contrast with your headboard fabric.
For a contemporary look, nailhead trim can be added as a metallic accent around the headboard's perimeter. It requires precise measurement and placement to achieve a professional look.
Consider using decorative piping or a bold fabric pattern to further customize your headboard. Ensure the pattern is aligned correctly for a neat appearance.
Lastly, choose appropriate hooks or brackets to attach the headboard to the bed frame. These should not only be functional but also complement the headboard's style.
Attach the Headboard
To attach the headboard to the wall or bed frame, use the appropriate hooks or brackets.
Begin by ensuring the D-rings on the back of the headboard are secure, which is essential for supporting the weight of a king-size headboard.
Locate the wall studs for a reliable mount and measure the distance between the D-rings, transferring these measurements to the wall to mark where screws or wall anchors will go.
Ensure the headboard fits your bed correctly and is positioned accurately. It's advisable to have someone help by holding the headboard while you attach it, starting from the top middle and ensuring it is level and centered over the bed.
If connecting the headboard to a bed frame, use brackets. Line them up with the frame's headboard attachments and fasten with bolts.
Once installed, the headboard should be secure and enhance your bedroom's aesthetic.
Final Touches and Mounting
After securing the headboard, ensure all foam and fabric edges are aligned for a clean finish.
For mounting, attach D-rings to the back of the headboard for wall attachment.
Ensure the headboard is proportionate to the bed size.
Iron the fabric to remove wrinkles and hang the headboard at the appropriate height above the bed frame.
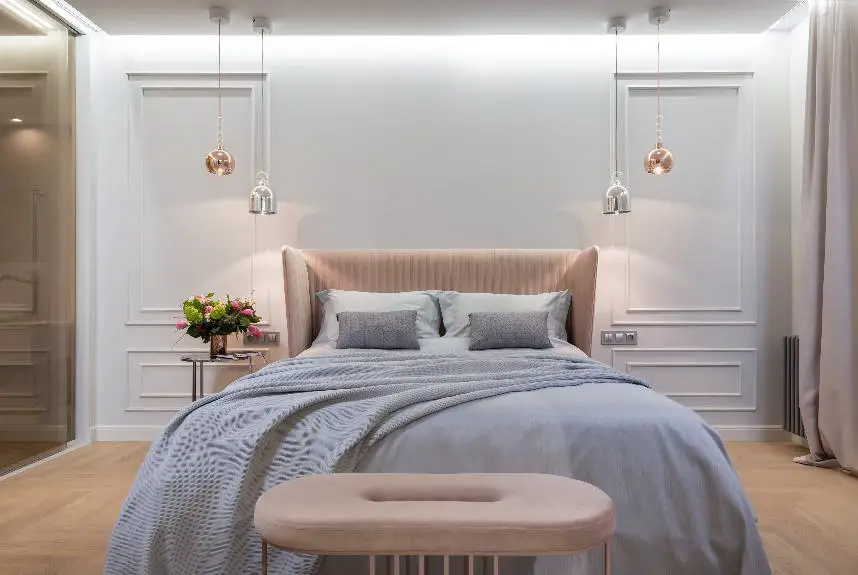
Complete the project by dressing the bed with fresh bedding.
The headboard is now ready for use.