When refinishing bathroom cabinets, apply two coats of a high-quality primer designed for high moisture areas or strong adhesion. This creates a consistent base and improves paint adherence, while covering any stains or color differences.
After priming, two to three coats of paint may be necessary, depending on the paint's coverage and the desired look. Allow each coat to dry as recommended by the manufacturer.
The exact number of coats depends on the cabinet's initial state and the materials used.
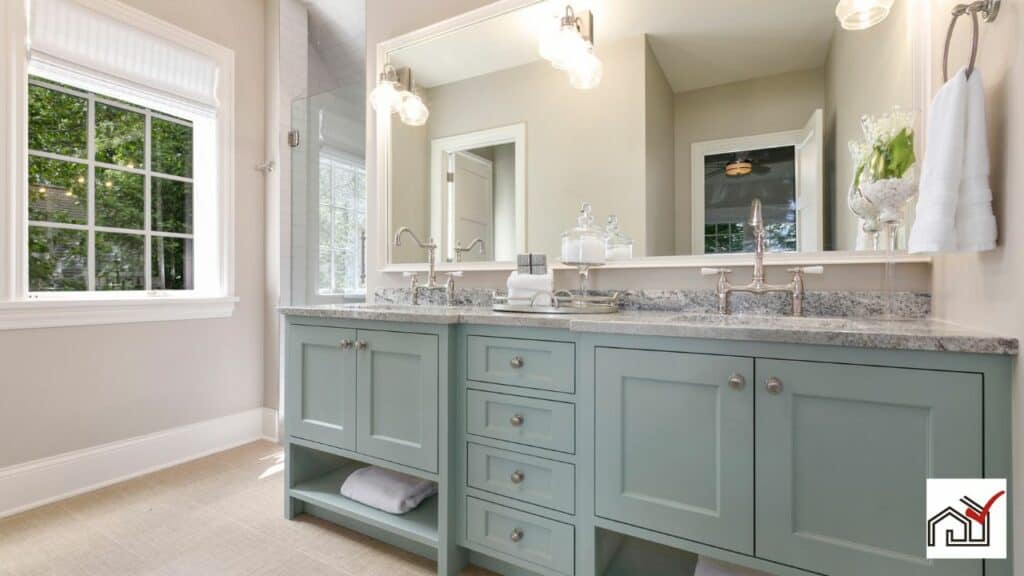
Assessing Cabinet Condition
To determine how many coats of primer and paint you need, first examine your bathroom cabinets for damage or wear. Look for cracks, dings, or holes, and fill these with wood filler for a smooth surface before painting.
Check if the cabinets were previously painted and if there is any peeling or chipping. If the original finish is still good, a light sanding can roughen the surface to help primer adhere. Cabinets with heavy wood grain may require a filler for an even surface.
After filling and letting it dry, sand the surface lightly to smooth it and enhance primer bonding. Clean the cabinets well to remove dust, dirt, and grease, which could ruin the paint job.
In short, evaluating the condition of your cabinets is key to preparing them for a high-adhesion primer and ensuring a durable and attractive finish.
Choosing the Right Primer
Choosing the right primer is essential for the best paint adherence and durability on bathroom cabinets. A good practice is to apply a first coat of primer, let it dry, and then apply a second coat for a solid base.
Oil-based primers are favored for bathroom cabinets due to their strong adhesion and stain-blocking capabilities. If using alkyd paint, shellac or oil-based primers are suitable, particularly with semi-gloss or high-gloss finishes that resist moisture and are easy to clean.
For those who prefer water-based products, a high-quality latex primer designed for high moisture areas can be effective. It's advisable to tint the primer close to the paint color to enhance coverage and color depth.
Follow the manufacturer's instructions for the primer, including drying times and the application of a second coat if necessary. This ensures a durable and professional finish.
Primer Application Techniques
To apply primer correctly on bathroom cabinets for a smooth base, choose the appropriate primer and use the right tools. You will need a quality brush and roller cover; use a natural-bristle brush for oil-based primers and a synthetic roller for water-based primers.
Typically, two coats of primer are recommended, particularly on previously painted cabinets or to achieve a very smooth finish. Apply the first coat evenly, covering all areas and edges. Let it dry as per the manufacturer's instructions, then sand lightly with fine-grit sandpaper to remove flaws.
After sanding, wipe away the dust before applying a second primer coat. This ensures a uniform base, which is crucial in a bathroom's moist environment. Proper primer application provides a strong, even foundation for better paint adhesion and a professional-looking finish.
Determining Primer Coats Needed
To determine the number of primer coats needed for bathroom cabinets, evaluate the cabinet's current state. Priming is essential for paint adhesion and even appearance. The number of primer coats depends on the paint type and the cabinet's surface finish.
For new or smooth cabinets, two primer coats are recommended for a smooth finish. The first coat seals the surface, and the second coat ensures coverage. For previously painted cabinets, an extra primer coat may be necessary to hide old colors or stains and provide a neutral base for new paint.
Choose the right primer for durability and adhesion. Oil-based or hybrid primers are suitable for less smooth surfaces or those exposed to moisture. In high humidity environments like bathrooms, use a shellac or oil-based primer for better moisture resistance.
Allow the primer to dry thoroughly before adding more coats or the final paint to prevent peeling or chipping. Adequate dry time varies by product. Properly assessing cabinet conditions and primer characteristics ensures a long-lasting and visually appealing finish.
Selecting Quality Paint
After applying primer, it's important to select a high-quality paint suitable for bathroom cabinets to achieve a durable and moisture-resistant finish. Oil-based, semi-gloss enamel paints are often recommended for their hard and shiny finish that is resilient in humid bathroom conditions. Choose a paint color that matches the bathroom's overall style. Paints can be custom-tinted for a personalized look.
If you're concerned about oil-based paint fumes, consider using a quality latex paint. Advanced latex paints, including polyester blends, provide moisture resistance, but oil-based paints are generally more durable. Oil paints may need thinning for a smoother application.
Use proper ventilation when working with oil-based paints to handle the volatile organic compounds (VOCs) they release. For a safer alternative in enclosed areas, use low-VOC acrylic paints, which have fewer fumes.
For both oil-based and latex paints, apply several thin layers for a professional and lasting finish. The sheen of the paint, with semi-gloss being a common selection, will influence both the look and ease of cleaning of your cabinets.
Painting Cabinet Surfaces
When painting bathroom cabinet surfaces, it is important to select the right paint and use proper application techniques. Start by applying a high-adhesion primer in two coats to create a smooth base. After the primer dries, apply a thin layer of paint along the wood grain to reduce brush marks and maintain a natural appearance. Wait several hours for the base coat to dry.
Check for any uneven areas or missed spots and lightly sand them if needed. Apply a second thin coat of paint, ensuring even application to prevent drips or runs. Only add an additional coat once the previous one is dry to avoid issues with the paint.
A third coat may be necessary for dark or vibrant colors to achieve full coverage. After the final coat dries, apply a protective top coat suitable for high-moisture areas to extend the longevity and appearance of the cabinets.
Evaluating Paint Coverage
Once the paint on the bathroom cabinets has dried, assess the coverage to check for consistency and full opacity. Ensure the paint has dried as per the manufacturer's instructions before inspection. Paint should feel dry to the touch, though thicker layers may need more time.
Apply paint with a brush or roller in even, thin layers. When dry, inspect the cabinets from different angles and under various lighting conditions for any missed areas, drips, or streaks. Ensure no previous colors or primer are visible through the final coat. If inconsistencies are found, lightly sand the area and apply another thin layer of paint.
Pay special attention to edges and corners to avoid excess paint or insufficient coverage. Achieving a smooth finish may involve light sanding between coats for better paint adhesion.
Use high-quality paint and primer suited for bathroom humidity and usage to ensure optimal coverage. Careful inspection after painting guarantees the longevity and visual quality of your work.
Final Touches and Cure Time
After painting the bathroom cabinets and achieving full coverage and smoothness, apply a clear topcoat to enhance the appearance and protect against moisture. Wear safety goggles and ensure good ventilation during this process.
Allow the topcoat to dry thoroughly. Cure time may be extended due to its thickness and protective nature, which is important for the durability of the paint. During this time, you may paint the vanity or make other improvements.
Once the topcoat is dry and hardened, reattach the cabinet doors and fronts. If updating the hardware, install it carefully to avoid paint damage.
The curing process can take several days. Minimize cabinet use during this period to avoid marks on the paint. Patience will result in a long-lasting finish.


